
How to Remove Wasp Nests Safely: A Step-by-Step Guide for Illinois Homeowners
Discovering a wasp or hornet nest in your backyard can be stressful—especially when you have children and pets around. These stinging insects can be aggressive when disturbed, so it’s crucial to approach nest removal carefully and safely.
Wasps and hornets are important for the ecosystem but become a hazard when their nests are too close to your living spaces. Removing a nest improperly can provoke a swarm and lead to painful or dangerous stings. That’s why understanding the right techniques and safety precautions is essential.
This step-by-step guide is designed to help Illinois homeowners safely identify, prepare for, and remove wasp nests while minimizing risk to their families and pets.
Step 1: Identify the Type of Wasp and Nest Location
Knowing exactly what you’re dealing with is the foundation of safe and effective nest removal. Different wasps and hornets build different types of nests in various places, and recognizing them helps you prepare the right approach and safety gear. Take a careful look at the insects you’re seeing and where the nest is located:
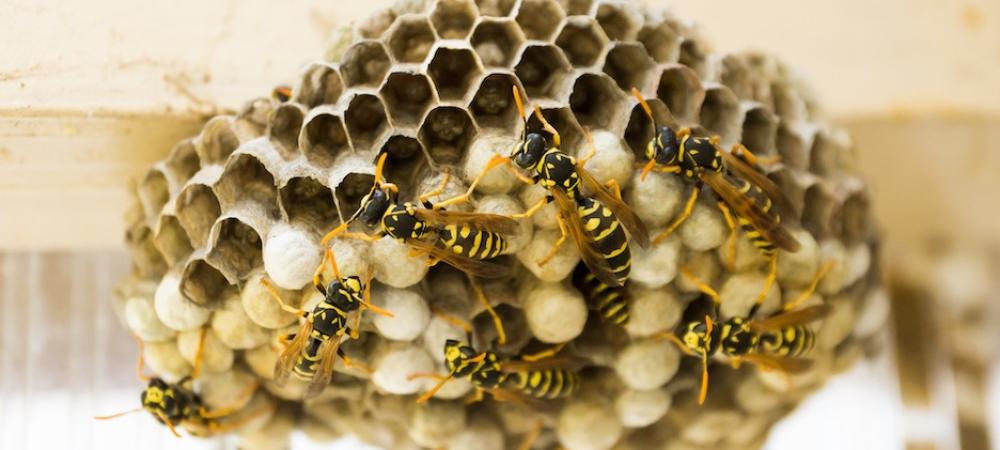
Paper Wasps
These slender, orange-brown wasps build open, umbrella-shaped nests usually attached to eaves, tree branches, or porch ceilings. Their nests have visible hexagonal cells.
- The reason identification matters is because paper wasps are generally less aggressive than other stinging insects unless they feel their nest is threatened. Since their nests are exposed and easier to access, smaller paper wasp nests are sometimes safer for homeowners to treat themselves IF proper precautions are followed.
Yellow Jackets
Stockier, black-and-yellow wasps, often more aggressive, build enclosed, football-shaped nests in ground holes, wall cavities, or hollow trees.
- Recognizing yellow jackets is important because they are among the most defensive and dangerous wasp species for homeowners. Their hidden nesting locations make them harder to eliminate, and disturbing the nest can quickly trigger swarming. Because colonies can contain hundreds or even thousands of wasps, professional wasp removal is often the safest option.
Hornets
Larger than yellow jackets, usually black and white or brownish, their enclosed nests hang from trees or high structures and can get quite large.
Locating the nest precisely (under eaves, inside sheds, on trees, underground, or inside walls) will help you plan a safe approach and decide if DIY removal is feasible.
Step 2: Gather the Right Equipment
Preparation is key to a successful and safe nest removal. Before you approach the nest, make sure you have the proper protective gear and tools on hand.
Here’s what you’ll need:
- Protective clothing: Cover as much skin as possible. Wear thick long sleeves, long pants, closed-toe shoes, gloves, and a hat. For extra safety, a bee veil or face net is recommended to protect your face and neck.
- Wasp and hornet insecticide spray: Choose a product specifically designed to kill wasps and hornets on contact. A long spray range (12-20 feet) keeps you safely distant during treatment.
- Flashlight with red filter or a red lens if working at night. Wasps cannot see red light, which reduces the chance of provoking them.
- A ladder to reach nests positioned high up.
- Plastic bags or containers if you plan to physically remove small nests afterward.
Having all your supplies ready before starting means you won’t have to make dangerous trips back and forth once you’ve disturbed the nest.
Step 3: Time It Right—Remove the Nest at Night
Timing your removal is one of the most important safety factors. Wasps are less active and tend to stay inside their nests after dark, so nighttime is the safest window for treatment.
To choose the best time:
- Wait for a calm, dry night without strong winds or rain.
- Use a flashlight with a red filter to avoid alerting wasps.
- Make sure your family members and pets are indoors, well away from the nest location.
- Plan for a quick, focused treatment so you can retreat promptly.
Attempting removal during the day can result in aggressive behavior and swarming.
Step 4: Approach the Nest Carefully and Spray
When it’s time to treat the nest, approach calmly and methodically. Your goal is to saturate the nest with insecticide while keeping a safe distance.
Here’s the safest way to go about removing a stinging insect's nest:
- Wear your protective gear fully and double-check everything is secure.
- Set your ladder firmly if needed, and keep your body positioned to the side rather than directly under the nest.
- Hold your long-range insecticide spray at the recommended distance (usually 12-20 feet).
- Spray the entire nest, focusing especially on the entrance or any visible openings.
- Saturate the nest thoroughly as per the spray instructions—typically 2–3 seconds or until it looks soaked.
- Immediately and calmly retreat to a safe distance after spraying.
Avoid sudden movements or loud noises to keep wasps calm.
Step 5: Monitor the Nest and Repeat if Necessary
One treatment may not always be enough. Wasps can be resilient, and some might survive or escape. Monitoring the nest carefully helps ensure complete eradication.
Here’s what to do next:
- Wait at least 24 hours after the first spray.
- Observe the nest from a safe distance for any wasp activity—watch for wasps entering or leaving the nest.
- If activity continues, apply a second treatment on the following night using the same safe procedure.
- Usually, two treatments spaced 24 hours apart are sufficient to eliminate the colony.
If wasps remain active after multiple treatments, it’s time to call a professional.
Step 6: Remove and Dispose of the Nest (Only When Fully Inactive)
Once you’re confident the wasps are gone, removing the nest prevents other insects from occupying it and reduces future problems.
How to dispose of a stinging insect nest:
- Wait 2-3 days after the final treatment to ensure all wasps are dead.
- Wear your protective clothing again before handling the nest.
- Carefully detach the nest using a stick, broom handle, or scraper.
- Place the nest immediately into a sealed plastic bag.
- Dispose of the bag in an outdoor trash bin far from your home.
Avoid disturbing the nest before you’re certain it’s inactive, as residual wasps may still sting.
Additional Tips for Safe Wasp Nest Removal
- Never use dangerous methods like burning the nest or dousing it with gasoline or water—these can cause fire hazards or aggressive wasp behavior.
- If nests are underground or inside walls, don’t try to remove them yourself—these locations are hazardous and require professional treatment.
- Always keep children and pets inside and away from the treatment area.
- Avoid spraying near windy conditions; spray drift can affect unintended areas.
- Use a mask or respirator if you’re sensitive to insecticides or dust.
- After removal, maintain preventative measures like sealing entry points and keeping your yard clean.
When to Call the Professionals
If you’re dealing with a large nest, hard-to-reach location, or dangerous situation, professional pest control is the safest option.
Contact pest control experts if:
- The nest is bigger than a grapefruit or very high up.
- Nests are inside walls, attics, or underground.
- You or someone in your family is allergic to wasp stings.
- You see multiple nests on your property.
- You feel unsure or unsafe handling the removal.
Companies like Crist Termite & Pest Solutions, Inc specialize in safe, effective wasp and hornet removal tailored to Illinois homes, ensuring peace of mind for you and your family.
Final Thoughts
Removing a wasp nest yourself is possible when you proceed carefully, use the right equipment, and respect the insects’ behavior patterns. By following this detailed guide, you can protect your family and pets from stings while effectively eliminating the threat.
If at any point you feel unsafe or overwhelmed, don’t hesitate to contact a professional. Your safety is worth it!